Introduction
Free Driver Backup enables backing up all the currently installed device drivers without the need for re-downloading drivers or using CD-ROMs. This makes reinstalling Windows hassle-free – you no longer have to waste time looking for old driver installation CDs or searching on the internet for the drivers compatible with your hardware.
Step 1. Activate Device Manager
Launch Free Driver Backup and all the recommended drivers display in the window. Choose one driver and you’ll see its related info like device, date, version, etc. Click “Scan Driver” and you’ll find 2 ways to scan the drivers.
“Scan recommended drivers” – only scan the drivers recommended by this program.
“Scan all drivers” – scan all the drivers installed on your computer.

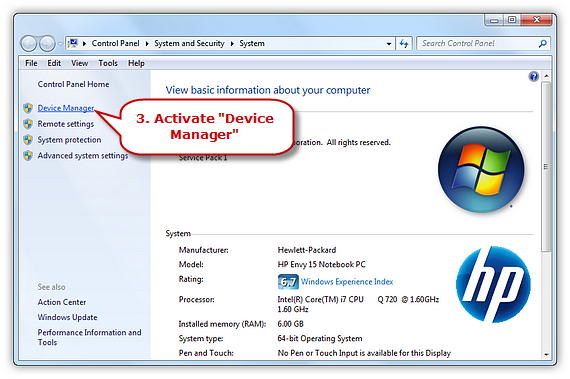
Click “Device Manager” to activate the “Device Manager” window.
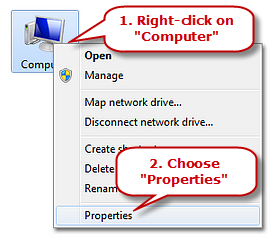
Tips: Opening “Device Manager” can be a slightly different process depending on the version of Windows you’re running. In general, you just need to find the Control Panel, double click “System” and find the “Device Manager” button there. In the Windows 7 Control Panel, Device Manager is under the System group. You can also right-click My Computer (or Computer in Windows 7), click “Manage” and then click on “Device Driver.”

Step 2. Reinstall the Driver
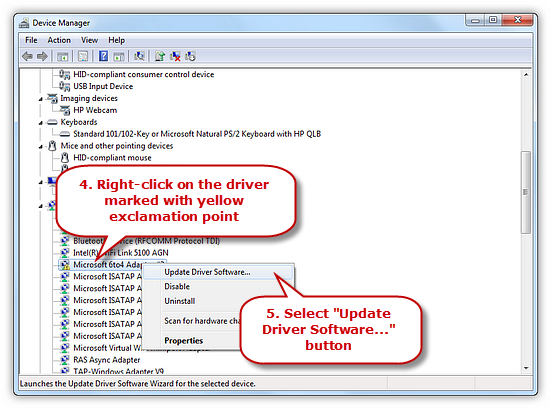
The missing drivers will be marked with yellow exclamation points. Right-click on the exact device and select the “Update Driver Software…” button.

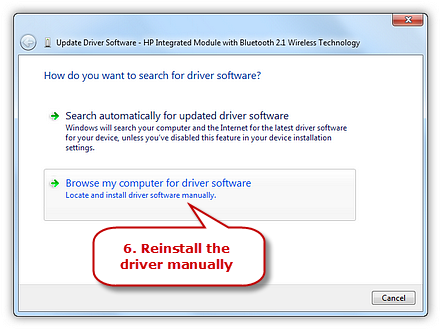
Click “Browse my computer for driver software” to choose the driver you want to reinstall from a particular location.

